Loading cloud data using AWS to Snowflake
In this blog we are going to learn how to load data from Cloud using AWS S3 specifically.
The aim of this article is to guide you through all the steps required from Setting up AWS to finally load the AWS data into Snowflake using staging. Zero to Snowflake it is!
Don’t worry, this article requires neither prior knowledge about AWS nor coding skill because we will guide you all along on how to leverage AWS S3 bucket and Snowflake.
All you need to do is to create an AWS account and create your Snowflake environment (check out our previous posts in this series to learn how to set up your Snowflake environment). Once you are done with that, you are so ready to roll.
Bear in mind that there are two components that we should have to enable this integration:
- URL to the Cloud Storage Location (e.g. AWS S3 Bucket)
- Cloud Access Credentials (e.g. IAM User: AWS Key ID and AWS Secret Key)
Create AWS S3 Bucket
The first component we need in order to make AWS S3 accessible to Snowflake is the URL to an S3 bucket. If you already have one, you can skip this step. In case you don’t and you want to follow along, follow this guide below:
- Sign in to AWS Console from here
- Search for S3 in the Search Box, or simply go to this AWS S3 Console link
- Choose Create bucket
- In Bucket name, enter a DNS-compliant name for your bucket. This must be a unique name throughout all the s3 buckets. Here I am using s3-bucket-snowflake as a name, but you can name it as you’d like
- In Region, choose the AWS Region where you want the bucket to reside.
- In Bucket settings for Block Public Access, untick the Block access to Public option
- Choose Create bucket.
Uploading your data to AWS S3
In case you already have a file in your S3 bucket, you can use that data as long as they are in the format supported by Snowflake. Check out our previous blogpost to make sure what data types are supported.
However, if you want to follow along using CSV files, download the data below and upload it to your S3 bucket.
Download s3-bucket-snowflake folder
In case you aren’t sure how to do that, follow these steps below on how to upload your local files into S3 bucket. More detailed instructions on how to do this are also available in this AWS documentation.
Setting Up AWS IAM User
The second component we need after creating an S3 Bucket and uploading the file into Snowflake is the IAM User.
IAM is an Identity and Access Management that will grant us a unique AWS Key ID and AWS Secret Key to be used in Snowflake for accessing AWS S3 Bucket.
Here, we are guiding you on how to create a user in AWS S3 from the AWS console:
- Sign in to the AWS Management Console and open the IAM console
- In the navigation pane, choose Users and then choose Add user.
- Type the user name for the new user (e.g. snowflake-user)
- Select the type of access this set of users will have: select both Programmatic access and AWS Management Console access
- For Console password, choose Autogenerated password
- Select Require password reset
- Choose Next: Permissions.
- On the Set permissions page, choose the last option Attach existing policies to the user directly
- Search for s3 and choose for AmazonS3FullAccess
- Choose Next: Tags, then Next: Reviews. We are not providing any tags or Reviews so you can skip these steps.
- Choose Create Users
- To view the users' access keys (access key IDs and secret access keys), choose Show next to each password and access key that you want to see. To save the access keys, choose Download .csv and then save the file to a safe location.
Setting Up Stages in Snowflake
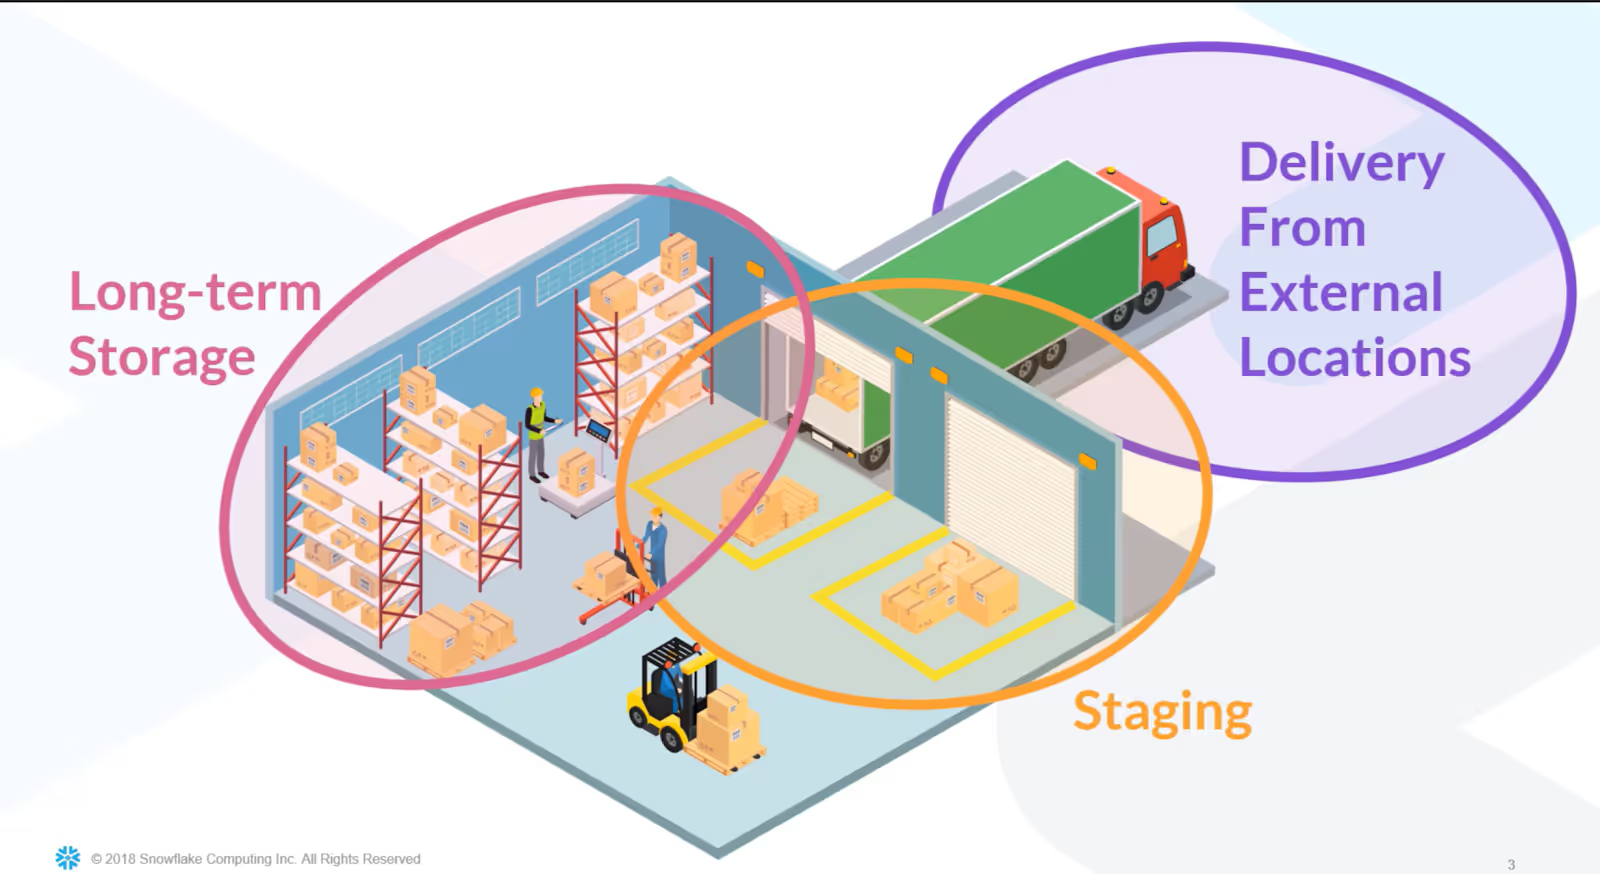
Now you got all the AWS components set up to finally be able to connect Snowflake and AWS. The next step would be to set-up staging in Snowflake. Stages or Staging Areas are places to put things temporarily before moving them to a more stable and longer-term location.
The concept of Staging in Snowflake comes from real-world warehouses. In the illustration below, the Staging Area is marked in yellow rectangles when trucks load and unload goods. Either the goods, or in our case our data, are going to be loaded onto trucks for the next delivery process or unloaded from the trucks to end up back on the shelves.
Snowflake stages are cloud folders or directories where we place files so that Snowflake services can pick them up and pull them into database structures quickly and securely.
Follow these steps to set-up a stage in Snowflake:
- Click Databases
- Click RETAIL_DB_SALES, the database we created in the previous post. If you don’t have it, you can create a new Database by selecting Create and use RETAIL_DB_SALES as a name
- Click Stages
- Click Create to create a new Stage Object
- Choose AWS S3
- Click Next
- Name your stage MY_S3_BUCKET
- Leave the default Schema Name set to Public
- Put the bucket URL address in the URL field. This URL contains the name of the AWS bucket we created at step 4 in the Create AWS S3 Bucket step above. In my case, the URL would be s3://s3-bucket-snowflake
- Next put the AWS Key ID and AWS Secret Key. This can be found either in the CSV you downloaded when setting up AWS IAM User (step 12 in the previous section). Or in your IAM User Console
- Encryption Master Key and Comment fields are optional, so we leave it blank for now and click Finish
Start Querying Your S3 Bucket
Now you can start calling your S3 Bucket via Snowflake using these steps below:
- Click Worksheets
- Type list @my_s3_bucket; into the Worksheet
- Click Run
- Now you can see the list of files that are in the S3 Bucket in the result pane. Here we see that our S3 Bucket has two folders being dev and prod
Move Data from Stage into Tables
As discussed before, a Stage is a “temporary” cloud folder that holds your data before finally moving it to a move permanent and secure location, like your database within Snowflake.
In order to do that, we have to Create a Table as a “home” to our AWS data and assign the File Format for Snowflake to be able to read our S3 data type.
The whole script we are using below is available inside the zip file you downloaded before (move-data-from-stage-to-table.txt).
Let’s go through it one by one:
- Create a new table using the User Interface by clicking Databases → Tables → Create → Add Table Name as Address → Add all your database columns
- Check to ensure you still have Sales_Data_Comma file format. You would have created this in the previous blog post. If your file format exists, skip to step 3.
- Use COPY INTO query to copy the AWS Address data to our Snowflake Address table. Use the query below and Run.
Or you can also run the query below in a Worksheet:
CREATE TABLE "RETAIL_DB_SALES"."PUBLIC"."ADDRESS" (
"Address ID" INTEGER NOT NULL
, "CITY" VARCHAR (30)
, "COUNTRY" VARCHAR (30)
, "Postal Code" VARCHAR (5)
, "REGION" VARCHAR (5)
, "STATE" VARCHAR (20)
) COMMENT = 'Table containing Address of Customers';
If the file format is not there, you can create one by clicking Databases → Click RETAIL_DB_SALES → File Formats → Add new file format, add Name and change the Header lines to skip to 1. You can leave the rest as is by default.
Or you can also run the query below in a Worksheet:
USE WAREHOUSE SNOWFLAKE_WH;
USE DATABASE Retail_DB_Sales;USE SCHEMA PUBLIC;
CREATE FILE FORMAT SALES_DATA_COMMATYPE = 'CSV'COMPRESSION = 'AUTO'FIELD_DELIMITER = ','RECORD_DELIMITER = '\n'SKIP_HEADER = 1FIELD_OPTIONALLY_ENCLOSED_BY = 'NONE'TRIM_SPACE = FALSEERROR_ON_COLUMN_COUNT_MISMATCH = TRUEESCAPE = 'NONE'ESCAPE_UNENCLOSED_FIELD = '\134'DATE_FORMAT = 'AUTO'TIMESTAMP_FORMAT = 'AUTO'NULL_IF = ('\\N');
In case Snowflake throws a warning that this file format has been created, no biggie. That means that the file format is there and you may proceed to the next step.
COPY INTO ADDRESSFROM @MY_S3_BUCKET/dev/FILES = ( 'Address.csv' )FILE_FORMAT = ( FORMAT_NAME = SALES_DATA_COMMA)
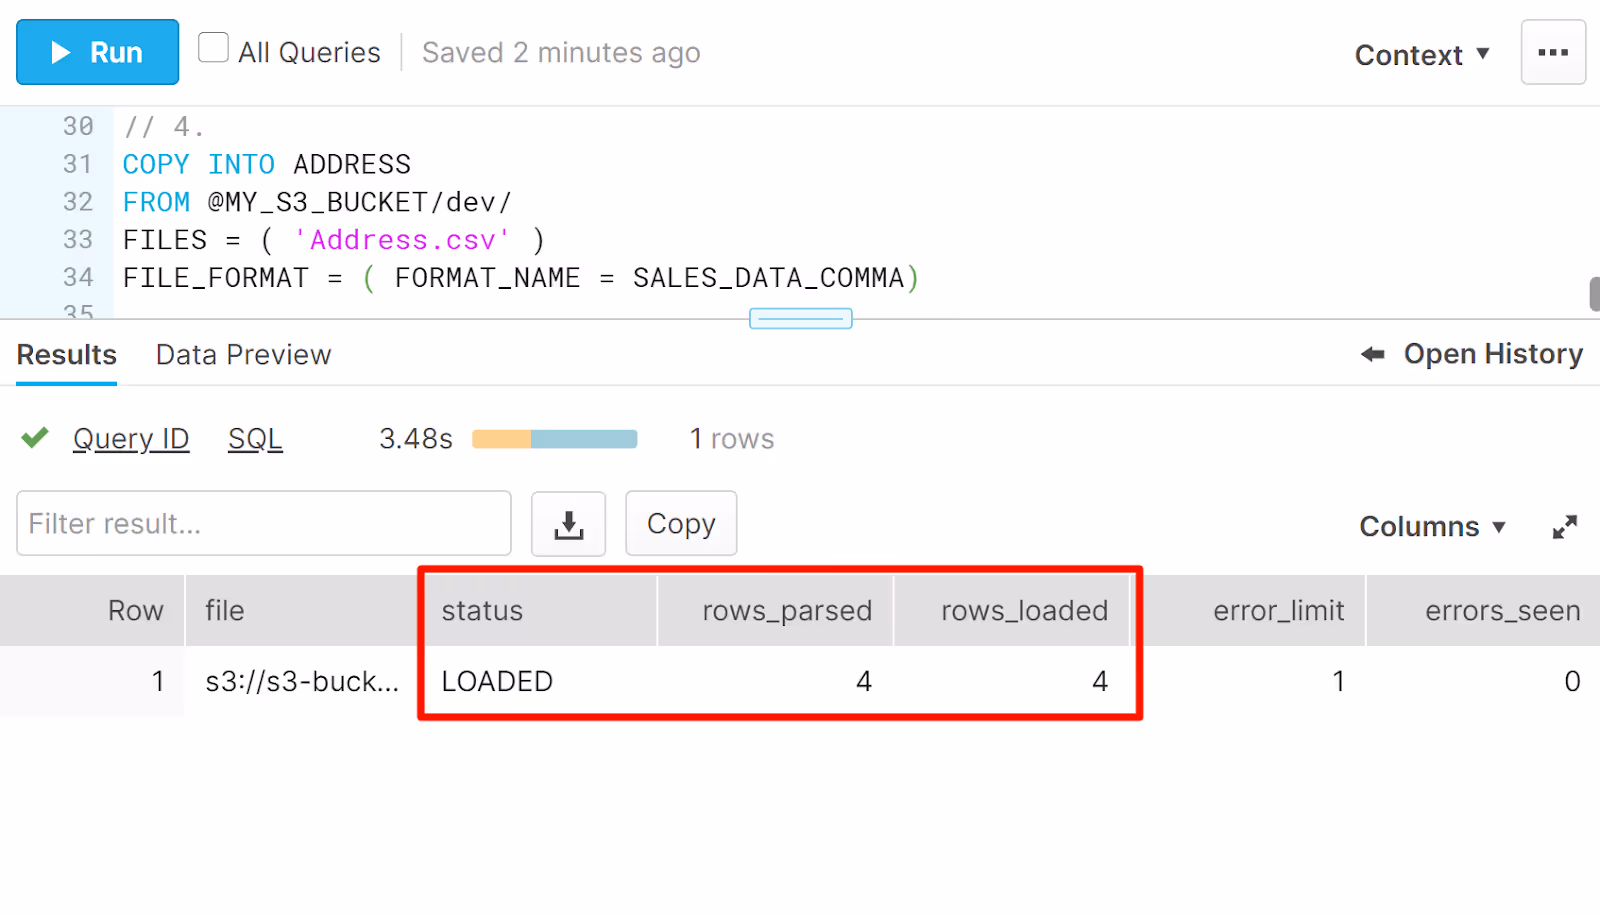
Based on the Results Pane shown here, the file has been loaded into the table. If the status is marked LOAD_SKIPPED instead of LOADED, that means that a file has been loaded before and Snowflake omits this loading to be done twice.
Should you want to reload the S3 file into the table, you can add FORCE = TRUE; after the last line of the query above. But be careful because loading it twice means that the rows will be duplicated.
Voilà!
Now you know how to load structured data from both a local environment and Cloud (AWS S3) into Snowflake. Stay tuned with other Biztory blog posts. We have much more interesting stuff waiting for you!